Thursday, June 23, 2011

Recipe #60: Fresh pepper sauces

Previous posts have described how to make Ghanaian  shito, or "black pepper." Today the focus is fresh pepper sauce. It is summertime here in Pennsylvania, and tomatoes are beginning to ripen. As they say in Ghana, "The good soup comes from the good earth." That holds for good pepper sauces, too. Truly fresh ingredients are the secret to good cooking, and today I'll explain how to prepare the Ghanaian answer to salsa. 

Give almost any homesick Ghanaian one of these simple-to-make sauces (requiring only 4 ingredients), along with a can of sardines or  Exeter corned beef, and some gari  or a ball of  kenkey, and he or she will likely be very happy. Fresh pepper sauces also go especially well with  Ghana-style grilled tilapia  or with eggs or  fried fish (kenan or kyenam, another recipe to come).

The "proper" (and easiest) way to make the sauces is to use an asanka
and the wooden mashing tool (called tapoli? apotowaiwa? could someone held me out?). That's what I used today, but you could also be creative and grate some of the tomatoes, onion, and pepper, briefly pulsing part of it in a processor or blender and combining them in the end. You definitely do not want to end up with a watery, bland, uninteresting mess, however. Remember, texture is very important in Ghanaian cuisine! (If you plan to do much Ghanaian cooking, I recommending  investing in an asanka.) It's also good to scald the asanka with boiling water before and after use. Barbara Baeta cleans hers using a little lemon juice as well).

Recipe #60 Fresh pepper sauces (red and green)

The "red" sauce uses red peppers, the "green" sauce green peppers. As I have mentioned before Ghana's kpakpo shito would be my first preference for the green sauce, but you can use any green pepper, with any degree of hotness that you like. Today I used a green  jalapeno for the green and a red Fresno chile for the red sauce. (Plus, I only made a half version to illustrate the technique).

Ingredients (Remember ,the proportions are quite flexible. After you make it once, you can adjust according to your tastes):
  • salt (about 1 teaspoon or to taste)
  • 1 large onion, any type, chopped
  • Plum or other tomatoes (I used Campari because they taste more like real tomatoes), a little over 8 oz, or about 1 1/2 cups when chopped
  • red or green chili peppers, about 2 Tablespoons (adjust to taste), minced
1. Wash the peppers (and remove the seeds and membranes if you wish) and carefully chop them (remember they are hot peppers!) Helpful hint: the finer you chop any of the ingredients, the easier it is to grind them in the asanka).
2. Peel and chop the onions.
3. Wash the tomatoes, cut them in half and remove the seeds, then chop them.


Put the chopped ingredients in the asanka with the salt. Using a rocking motion, crush a little of the ingredients, and continue working your way around the bowl until everything is well mashed, but small pieces of pepper, tomato and onion still exist. This takes a lot of energy, and about 10 or 15 minutes. (If you have a Ghanaian friend/spouse around, they can probably help you with this. Once again, it's not as easy as it looks.)


The sauce can now be eaten, but Barbara Baeta suggests adding another step to make it less watery and raw tasting: simmering it over low heat for about 20-30 minutes. 

That's all there is to it! The one on the left (using green peppers) has been simmered and the one on the right is uncooked. If not eaten immediately, refrigerate and use within a day or so.


Wednesday, June 22, 2011

Great Grilling: Recipes #58 (Grilled Tilipia) and #59 (Grilled Prawns/Shrimp), and a plea to African entrepreneurs

Grilling over wood or charcoal is a basic cooking technique in much of Sub-Saharan Africa, and Ghana is no exception.  Today's recipes features 2 favorites.

But first, an aside for all of you African culinary entrepreneurs, including farmers in or out-side of the U.S. seeking ideas for the next big thing: I spent a good part of yesterday trying unsuccessfully to locate several ingredients that are not available locally, and that stimulated me to offer some more ideas for new products ( I'd be happy to serve as a consultant):

1. A bottled dry spice mixture for authentic kelewele (just add fresh grated ginger and onion).
2. A frozen version of the complete kelewele spice mixture that could be defrosted and used directly with ripe plantains.
3. Kpakpo shito seeds: I've already had several offers from local organic farmers to grow them for me if I can find any that have been legally exported). Kpakpo shito refers to the small green roundish peppers located in the center of the photo to the left, which features peppers common in Ghana. This pepper's spicy yet sweet flavor is impossible to duplicate with the chiles readily available in the U.S. There is one online company that markets and lists these as a variety of capsicum chinense, but I'd rather trust a Ghanaian to know a proper kpakpo shito. BTW, this is the Ga name. I've also seen it called a "scented" or "krona pepper," or a variation of mako ("mako" means pepper in Twi and Fanti: opapomako or makohuam, or ghatadi in Ewe) Also, I'm looking for a traditional one that is not a hybrid. Please let me know how I can buy some to grow in the U.S. (and not just sneak possibly contaminated seeds into the U.S. without declaring them!)
4. Same thing for agushi (egusi) melon seeds. I substitute pumpkin seeds in North America when I cannot get to an African market, but wish we could grow our own.  As I've mentioned before, the book on the so-called Lost Crops of Africa, Volume II, has a wonderful section on  egusi/agushi (pp. 154-171). Also, see the most recent issue of John Hopkins Magazine for an update of the books and their impact.
5. Same thing for bambara beans (pp. 52-73).


Okay, now for the recipes:

Recipe #58: Ghana-style Grilled Tilapia

As I explained in "We Eat First With Our Eyes: On Ghanaian Cuisine," the most common fresh-water fish in Ghana is tilapia, and Ghanaians have also practiced small-scale fish farming for many decades, harvesting  fish from streams, rivers, lagoons and fish farms. Tilapia consumption has also been growing in popularity in the U.S.

Perhaps the favored way to eat grilled tilapia in Ghana is with banku (for more information and recipes, see 1 and 2), shito, and fresh pepper sauce (I'll post some recipes as soon as I recover from my grief at not having any kpakpo shito), as in this photo I snapped at the African Village restaurant at La Palm in Ghana. You'll notice that the head and tail are both left on the fish. As Barbara Baeta explains: "Ghanaians feel cheated if you don't leave the head on. . . We eat all bones--fish bones, chicken bones, meat bones. Maybe that's why we have such healthy teeth."


For 4 medium-sized tilapia

equipment you'll need:
  • a grill and charcoal, obviously
  • a fine grater [or grinding stone ;-)]
  • a sharp knife
  • a brush for basting
  • a cutting board or plate
  • a blender,  food processor,or grinding bowl (asanka
  • a fish basket for turning the fish, if you have one (optional)
ingredients you'll need:
To season 4 medium tilapia (about half a pound each, or about 2 pounds total), mix together in a bowl:


  • 2 Tablespoons grated shallots or onion
  • 1 Tablespoon vegetable oil, like canola (plus you will need several more Tablespoons for basting)
  • ~a teaspoon of salt (Note: people in Ghana will often use a crushed shrimp-flavored seasoning cube as in the photo on the left, but I omit this. I use a little extra seasoning salt and spice mixtur
    e (e.g., some dried ground crayfish and/or garlic, no-salt seasoning mixes).
  • 1/2 teaspoon hot ground cayenne pepper or to taste
  • about 1/4 cup (4 Tablespoons) of fresh chili pepper (kpakpo shito if available), ground. To reduce hotness, use a mild chili.
  • ~ 1/2 teaspoon peeled, grated fresh ginger
    Either before you make the seasoning, or while you are preparing and seasoning the fish, light the charcoal (about 2 pounds) and allow it to burn down for about half an hour, fanning it if necessary.
    To prepare the fish:
    •  Clean and wash the fish, and descale it if necessary. Leave on the heads, but remove the gill covering and hard fins. Please note that this, like pounding fufu, is not as easy as many Ghanaian women make it look. It requires a very sharp knife, patience, and care. Even so, I often end up defacing (can you deface a fish?) the fish head and removing the gills, fin, and numerous bones while I'm preparing an already scaled and gutted fish. Not to worry. It will still taste great.
    • Cut 2 diagonal slits of each side of each of the fish.
    • If you have "strong" hands, use them to stuff and rub the seasoning mixture all over the fish, rubbing it into the slits and also inside the fish. Otherwise, you may need to use a spoon or gloves. Do not discard the dregs left in the bowl.
    • Leave the marinade on the fish for at least 5 to 15 minutes (5 minutes only for a milder flavor)
    • Brush the grill with oil, and place it almost directly on top of the coals (about an inch above them). Baste the fish with a little oil to keep it soft and moist. After 3-5 minutes, turn over the fish and baste this side with a little oil as well.
    • Add a couple of tablespoons of oil into the bowl that held the seasoning mixture. Using your hands or the brush, shake the oil over the fish (don not try to brush it on, however) until all the seasoning mixture is used, as you continue to turn the fish every few minutes. Depending on the thickness of the fish and the heat of the fire, it should cook in about 10 to 15 minutes. Be careful not to burn the tail of the fish (a little foil on it near the end of the grilling might be in order).
      Voila! Ghana-style grilled fish.  Enjoy. In the interests of full disclosure, and because I think we can learn from our mistakes, let me confess that I was breaking in a new grill today and failed to properly oil it, so the skin on my tilapia stuck to the grill and burned (that's it next to the grilled fish on the plate below). Also, please notice that these recipes are quite flexible, as is much Ghanaian cooking: I could only find one large tilapia, weighing about 1.5 pounds, so I substituted that for 4 small ones, so I made 3 slits in it instead of only 2. Also, it had already lost most of its tail to the butcher.
      Recipe #59: Ghana-style Grilled Prawns/Shrimp     
      Many delicious crustaceans are found along West Africa's coast and in its rivers, including Ghana's. And grilling is a favored way of preparing them, as in this recipe which is reminiscent of southern Africa's peri-peri (or piri piri) prawns or shrimp.
      One tends to see a lot of grilled prawns being sold along the roadside near the coast in Ghana. They may also be served in buffets with other dishes, or, as an upscale party appetizer.
      The photo above was taken in Ghana, where fresh prawns  are abundant, but today I've had to substitute frozen tiger shrimp. In Ghana, one leaves the head and tail on, but unfortunately the only large shrimp I could find in State College have all been beheaded. This detracts from the fabulous presentation, but, as my husband is fond of saying "such is life."
      Allow 2- 3 of these shrimp per serving (I'm cooking  6 today). As with the recipe above, remember to start the charcoal ahead of time (about  30-45 minutes before you need it) so it will be ready by the time you have the prawns/shrimp prepared for the grill. Also, if you are using wooden skewers, put them in water to soak for an hour or so before you use them on the grill.
        
      To prepare about 2 pounds (or a kilo, which is 2.25 pounds) of large shrimp or prawns in a bowl prepare a mixture similar to the one used with the tilapia above, but with garlic and fish spice:
      • 1/4 cup grated shallots or onion
      • 1 heaping teaspoon fresh ground or grated ginger
      • 1 teaspoon fresh garlic ground/grated/crushed
      • 1 teaspoon salt or seasoning salt (or more to taste)
      • 2 teaspoons of dried ground red pepper (more or less to taste)
      • 1 heaping teaspoon fish spice (may include salt, pepper, celery, thyme, sage, etc.) {I like to use  a fish masala}
      • 4 Tablespoons white vegetable oil (canola or similar) 

        Prepare the shrimp by deveining them (that means make a cut along the back and remove the thick vein. I find I sometimes I need to devein the underside as well.) You may need to rinse them as you go along).  Leave the head on (if you can get shrimp or prawns with them still attached) and the tail.  Leave the last piece of shell next to the tail so that it stays attached. If the head falls off while grilling, it can simply be slipped back on. (Another way to prepare them is to butterfly some or all of them, which increases the surface coated by the spicy seasonings.)
        You also need
        • a lemon or two
        Rinse, then cut the lemon(s) in half and squeeze the juice into a bowl (I use an asanka), straining out the seeds with your hands or a strainer. Add about 3 cups of water to the bowl. Put the shrimp/prawns into the water, mixing them well to coat all parts of them. Set them aside to drain (I use a paper towel.) Stir the marinade, then gently add the shrimp/prawns to it, making sure all parts of them are well coated. Leave them in the marinade about 10 minutes. Remove and place them on skewers, beginning at the tail and working up to the head (if there is one). This prevents the shrimp/prawns from curling up as they cook. Brush the grill well with oil and have it close to the coals. Drizzle a little oil over each skewer, turning it over so both sides are coated. Turn the skewers every couple of minutes so they do not burn. Add more oil if necessary.
            They should cook in about 5-8 minutes, depending on the size of the prawns.
              These grilled shrimp/prawns can be eaten with plain boiled (or coconut) rice, a standard tomato gravy (a basic staple of Ghanaian cuisine), vegetables, yakayake (another recipe to post later), yam, abolo (yet another recipe coming) or served as an appetizer.
              Here are the shrimp I grilled today:
              Now it's time to eat.

              Tuesday, June 21, 2011

              Recipe #56: Coconut Rice (3 ways) and #57 Coconut Smoothie

              Yesterday I explained how to make your own coconut water/milk/cream. The convenient alternative, of course, is to substitute a canned (unsweetened, of course) version. Here are a few recipes using that coconut milk and/or cream. If you keep reading to the end, you'll find a contemporary recipe using coconut milk and cream (aka cream of coconut) and some fresh things I have handy in the house (pineapple and banana and some vanilla bean).

              Rice seems to be an increasingly popular choice in Sub-Saharan Africa. I've posted rice recipes before (e.g., jollof rice or ricewater or tatale made with rice flour), but today's easy recipe enriched by coconut milk/cream  is a standby when I do presentations. Here are 3 versions: a small quantity cooked in a microwave for my dinner, an intermediate version cooked in a rice cooker, and a special quantity version prepared in the oven.

              Recipe #56: 3 versions of Coconut Rice

              1 cup in the Microwave: It's really almost embarrassingly easy: simply substitute part coconut milk for the water when cooking the rice, and a little coconut cream if you want it even richer. Or, it's easiest to just stir the cream into the coconut  water and use that for part of the liquid in the recipe.

              Here's how to cook a cup of white rice in the microwave (this is officially 4 servings):
              I prefer basmati or jasmine or any other long-grain rice  (actually, Asian rices are largely replacing traditional rices in much of West Africa), and a tablespoon of the coconut cream  mixed with enough coconut milk to replace 1/2 cup of the water. As I said, you can just mix together the cream and milk and use 1/2 cup of this rich coconut milk with a cup to 1 1/2 cup  of water. I cook my rice without salt, but you can add a little if you wish. (NOTE: After living in Japan, I always rinse my rice at least twice before cooking it.) In my Nordic Ware microwave rice cooker, I need to cook the cup of  rice at 50% (medium)  for about 15-20 minutes, covered, with the vent holes in the lid open, then remove it from the microwave, close the vent holes, and let it sit for another 5 minutes or so to steam before fluffing it with a fork. You may have to play with your microwave a bit to get the timing right. If your rice is not soft enough, you may also want to add more water. While fluffing the rice, stir any of the coconut residue back into the rice. Enjoy with any stew.

              3 cups in the rice cooker (or on stove top): The rice cooker is my preferred every day way to cook rice, especially when family or guests are around. For 3 cups I  use 1 1/2 cups of coconut milk (and a few tablespoons of the cream if making a rich version, along with 3.5 to  4 cups of water (Use a little more if cooking on the stove top). If I want to dress it up a little, I increase the proportion of coconut milk and/or add a little turmeric (about 1/2 to a teaspoon) or a few strands of saffron to give it a lovely golden color. I used 1/2 teaspoon (2.5 ml) to give this rice its pale yellow 
              tint and delicate flavor.


              16 cups  cooked in the oven  
              (for ~ 60 people: 1/4 cup rice=1 serving=1/2 cup cooked rice):
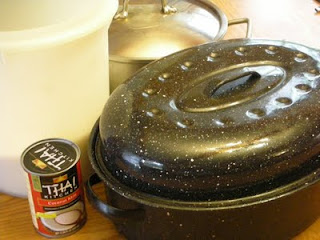
              NOTE: I have a large oven that will fit 2 large roasting pans with covers in it. Recipe can easily be halved:


              16 cups of rice (already washed)
              2 cans  of coconut milk with cream (or milk and cream from 2 coconuts)
              salt (1/4 teaspoon for each cup of rice, or ~1 1/2 Tablespoons)
              ~30 cups of water

              Prepare coconut milk and cream (or open cans)
              Bring 32 cups of water to a boil on the stove top in one or 2 large pots. Add the salt and coconut milk/cream to the water
              Preheat oven to 375 degrees F

              Put half of the rice in each of 2 large roasting pans. (8 cups in each). Open the preheated oven, pull out the racks and place the pans on them. Put  half (14-15 cups of the hot water/coconut/salt mixture in each pan. You can always add a little more water later if the rice is too dry). Stir. Cover immediately with lids and gently push in the racks and close the oven. After about 30 minutes open the oven, carefully tilt and  lift the lids (avoiding the steam) and stir. Reheat the water still in the pan and add more if necessary. Replace the lid and allow the rice to finish cooking. It may take 45 minutes to an hour. As with the version in the rice cooker, you can add a teaspoon or more of turmeric to each pan and stir it to blend if you wish to color it. If the rice seems too wet, simply remove the lid near the end of the cooking. This is the only way I can make large quantities of rice without having them go mushy on me the way they do when I cook on top of the stove.

              Recipe #56: Coconut-pineapple-banana-vanilla smoothie

              The last few times I've been in Ghana and have prepared fruit smoothies, I have found my friends and family  wildly enthusiastic about them, and frequently am asked for directions on preparing them. This is just another example of the creativity and openess to experimentation of many Ghanaians. Once again, smoothies are more a concept than a recipe, but since I've been in the kitchen this morning writing and preparing coconut rice, I'm taking a break to cool off. Yesterday I noticed that some fresh pineapple was starting to look slightly tired and in need of freezing to prevent it going bad, so I popped it in the freezer, along with a banana. Since I was making coconut milk and cream yesterday, it's a natural to combine them with a few ice cubes (or ice blocks, as they tend to say in Ghana), and a little bit of Madagascar vanilla bean I picked up at Pete's coffee shop in Berkeley a few weeks ago (I'm sure vanilla extract would work, too). Let me go combine them 

              1 cup of frozen pineapple chunks, 
              1 frozen banana cut into chunks, 
              4 or 5 ice cubes,
              an inch of vanilla bean (or 1/2 to 1 tsp vanilla extract)
              1 cup of rich coconut milk. 

              I never peel my bananas before I freeze them, so if you follow my lead, be prepared for cold hands while you peel frozen bananas (I always use a knife). Also,  break up the pieces of frozen pineapple as you put them into the blender. Finally, if you have a sweet tooth, add a couple of teaspoons of some kind of sweetener like honey, sugar, or syrup.) Let me go and blend this together and let you know how it comes out. My daughter Masi called from Nigeria yesterday and when I mentioned that I was going to make this, said "Oh, it sounds just like a pina colada without the rum." She's right.Unfortunately I cannot locate any fresh sugar cane locally today to make swizzle sticks to make the drink more playful. (I'll post some sugar cane recipes when I can locate some.) Oh well, use your imagination today!

              Oh, yum!!!! This really makes enough for 2 people, but since I'm alone today it's all mine. A perfect way to end my time in the kitchen. I was in a hurry to drink it so I grabbed some pineapple mint and spearmint from the garden and set it right down outside the door to photograph it. BTW, I happen to love frosty cold drinks, but you could also blend unfrozen pineapple and banana with a few ice cubes to make a "milder" version. . . And you know, I'll bet it wouldn't be bad with a little rum, either. . .


              Monday, June 20, 2011

              Wonderful ways with coconut: recipes #54 and 55

              I have enthused about the noble coconut in previous posts, such as recipe #13, and given instructions on how to open them as well. Starting today I'll expand on the topic with several coconut-themed recipes.

              Let's begin with a wonderful refreshing drink, simple chilled coconut water. The coconut water is the liquid inside the young coconut before it matures, and is enjoyed in many tropical countries--for me, mostly that means Brazil and Ghana. It is found both in young green coconuts, and the more common brown-skinned ones available in grocery stores in North America. It has become something of a fad drink recently in the U.S., where its health benefits are increasingly being exalted and it is hailed as a sports, anti-aging  wonder drink. It is available in canned form, but is easy to obtain directly from a coconut. Locally, a fresh (brown-haired) coconut costs about $2. If you can get a fresh green coconut, so much the better. However, a brown one will also provide coconut cream, coconut milk, and coconut fiber for baking.

              Recipe #54 Refreshing Chilled Coconut Water

              Chill a fresh coconut in the refrigerator if you want to drink the coconut water immediately when you remove it. Of course, if you have a straw, a spoon, and a fresh young green coconut, all you need to do is whack off the top of the coconut (not as simple as it sounds without a machete), insert a straw, and enjoy. Use a spoon or a piece of the shell to scrape the soft gelatinous substance inside and eat it straight from the coconut.

              However, those of us living outside of tropical climes or far from well-stocked markets can still enjoy sweet coconut water.

              First, assemble some newspaper; a hammer; a sharp clean object like an ice pick, nail or screwdriver [alternatively, I've heard a corkscrew also works]; a measuring cup or similar cup that holds at least 1 cup of liquid; and a fine mesh strainer that will fit over the cup. Remember when you buy your coconut to shake several of them first: the more liquid sloshing around inside, the better. I had to go to two stores before I found one I liked for this blog posting.

              Set the strainer over the measuring cup, then use the hammer and the ice pick to poke through each of the three eyes of the coconut. Wiggle the ice pick or screwdriver, etc. in each of the holes to enlarge them a little then turn the coconut upside down and let the liquid drain directly into the cup. You may like to pour it through the strainer again as you pour it into a glass. My coconut yielded about 2/3 cup of delicious coconut water as you can see in the photo at the top of this blog posting. Head outside to the patio and enjoy (or refrigerate until you have time to take a break).!

              Alternatively, if you prefer you can use the coconut water  in making your own coconut cream and coconut milk to further use in recipes for things like  coconut rice  (recipe #56) or a coconut smoothie (recipe #57), both forthcoming recipes in the next day or two.

              Recipe #55: Coconut Cream and Coconut milk

              Coconut milk has many uses. Some people (like my daughter Abena) with cow's milk allergies may find it helpful to prepare coconut milk that they can use as a substitute. It is also a wonderful rich addition to rice or some stews.

              There are several ways to prepare coconut milk. In earlier years, I laboriously grated the coconut, poured boiling water or it, then strained it. Nowadays, it's much easier to enlist the help of a good blender, if you have one.


              Let's return to the coconut above after draining out the coconut water. I assume you've already found a hard surface to spread out the newspapers on (usually the patio or cement garage floor for me). Begin hitting the coconut with the hammer until it breaks open, then keep hitting it until much of the hard outer shell has broken off from the meat. Carefully use a table knife to pry off the  rest of the shell.

              Rinse the coconut meat under water and discard the outer shell. While you want to leave the brown skin on the meat alone, you want to make sure to remove all the hard bits of shell or you may break your blender during the next step.

              Add about a half cup of water to the coconut water you obtained when you first drained out the coconut and heat the mixture to almost boiling (in a microwave if you have one). Chop or break the coconut meat into small pieces in a bowl. Using a blender, add some of the coconut meat with about a third or more of the hot water mixture, and begin blending it. Repeat this process until all of the coconut is ground up. This step took me about 10 minutes, repeatedly adding small amounts of coconut and liquid, mixing it up and pushing it down as I progressed (perhaps a food processor would work better?). I was afraid my blender might overheat, so I periodically turned it off to cool as I worked. Heat up a little more water and add it if necessary to get the coconut well blended.

              Set a strainer over a bowl (I used a stainless steel bowl), and line it with a piece of folded cheesecloth, then pour the mixture from the blender container onto it. Use a spatula to scrape out as much of the coconut mixture as possible.

              Gather up the edges of the cheesecloth and twist and squeeze it until as much of the liquid is removed as possible. This is your first, and richest coconut milk/cream mixture. Pour it into a jar.  If you were raised to be thrifty (like me), you
              can take another cup of water, use it to rinse out any dregs in the blender container, spatula, etc., and also heat it to almost boiling. Spread out the cheesecloth over the strainer again, and pour the liquid over the chaff in the cheesecloth, again squeezing and twisting the cloth to remove as much liquid as possible. Pour this into another jar, and you have your "light" coconut milk. It is possible to repeat this process a third time, getting, obviously, a progressively weaker coconut milk each time.

              Freeze the coconut chaff for use in baking to add flavor and fiber.

              If you put the 2 jars in the refrigerator you'll see the coconut cream rise to the top. The first batch of coconut milk will have the most cream. In cooking, the cream may be used like any cream, or you can shake or mix the cream to add it into the milk.

              Sooooo, if you're a purist, or you want to reduce your carbon footprint, or avoid any additives in your food  (the canned versions tend to have guar gum added as an emulsifier), or, want to save money (coconut water, milk, cream, and chaff from a single coconut), or  just experience the joy of "cooking from scratch," I recommend savoring home-made coconut water/milk/cream!

              Sunday, June 19, 2011

              King of Kelewele: Recipe #53

              Today is my son-in-law's first official Father's Day (his Kumiwah is 3+ months old), and this post is dedicated to him. 

              I have frequently mentioned my own love of kelewele, a wonderful Ghanaian snack. Koranteng, however,  is a a real kelewele connoisseur. The international wedding quilt we assembled for him and Abena in 2005 included a square from Ghana featuring his beloved plantain favorite. He also has a photo online from a Christmas feast at home in Ghana in 2009 that prominently displays some cubes of kelewele.

              Whenever one  stops by his apartment in Berkeley, one always finds several plantains in various stages of ripening until he deigns them properly ready to be transformed. He expertly peels and slices the plantains, then portions out some of his  treasured "Maame's" kelewele spice mix prepared in large batches for him in Ghana, and brought periodically to California by visiting family members.

              While I have not attempted to obtain the exact ingredients in "Maame's" special mixture, combining my taste experiences enjoying it with my time in Barbara Baeta's test kitchen in Ghana, I'm developing my own version. I happen to really like fresh ginger, plus I've borrowed Maame's use of fresh habenero peppers to replace dried red pepper, and I've used onion generously as well (too generously for the first unsuccessful batch). Feel free to tone down or even omit spices if you prefer a milder or simpler version.

              First, assemble the ingredients. If you look carefully at the photo of the ingredients taken in Ghana when I first made kelewele, you'll see in the very center of the plate a small oval-shaped spice. I'm not sure what that was as I did not include it in my notes, but have decided to try using a little nutmeg to flavor the spice mixture, along with salt, aniseed, cloves, ginger, onion, red pepper, and hewntia.

              So, here is Fran's  gourmet version of kelewele

              Well, it's several testing hours later, and I still only have an in-progress working recipe. I thought it would be easy, but you know, it seldom is on the first try. My initial attempt had way too much onion, not enough aniseed or ginger. Plus, I did it all by hand: ground the hard spices in a marble mortar and pestle, finely grated the onion and ginger by hand, and blended the fresh hot pepper coarsely in an electric blender, then finished it in the marble mortar. Lots of work, but as soon as I coated the ripe plantain and put it in the deep fryer, I knew I had too much onion.

              For the second effort, I adjusted amounts and coasrely chopped the ginger and onion and broke the hwentia into pieces, then simply ground everything in an electric blender with a couple of tablespoons of water (using an inverted glass canning jar since I learned that they'll fit on most blenders). Better, but when I coated the plantain before frying it, the coating was stringy and stuck in clumps onto the cut-up plantain.

              The 3rd time I squeezed out the coarse fibers and just used some of the liquid to coat the plantains, and this seemed to work best.

              However, on top of everything else, part of the secret in making good kelewele is having the plantains ripe enough, so the sweetness comes through and they kind of carmellize on the outside. It's hard to come by properly ripened plantains in central Pennsylvania, and I had to use some that were not quite ready, so that added to the difficulty.

               Recipe #53: Classic Kelewele (spicy fried  ripe plantain cubes)

              However, here are my step-by-step directions to date. Feel free to give me any feedback on the recipe.

              1. Assemble ingredients:  You'll need several ounces of fresh ginger (say, 2 to 4 oz), a teaspoon of anise seed, about 1/4 teaspoon salt (or more to taste), 1 teaspoon whole cloves, about 1/4 teaspoon nutmeg (optional), about 3 or 4 sticks hwentia (to be purchased online or at a West African grocery), part of a yellow or red onion (to get a couple of tablespoons), and a fresh red habanero or dried red pepper flakes or ground red pepper, to taste (I'd start with about half a teaspoon and add more the spicier you like it), 4 slightly over-ripe plantains (will be somewhat black and soft, but not completely).

              2. The easiest way to make the seasoning mixture is to grind the ingredients together (except for the plantains!): peel and chop a little onion coarsely (to get a couple of tablespoons), peel and coarsely chop a few ounces of fresh ginger (I don't recommend using dried ground ginger), some red pepper, fresh or dried as explained above (if using fresh, cut off the top and make sure the seeds are not black; for a milder flavor, remove the seeds and membranes before adding to the blender, using a small container like a canning jar (it's easier to blend them in a smaller container), 3 or 4 broken sticks of hwentia (adds a spicy, peppery, but not hot, flavor), and 2 or 3 tablespoons of water. You may need to remove the jar and shake it then replace it a few times to blend the seasonings completely.If you  use a regular blender containert, you'll probably need to stop several times and use a rubber spatula to push the mixture down as you blend it.

              Pour the seasoning mixture into a small bowl and let it sit while you peel and cut the plantains.As I mentioned, the third time I made this, I squeezed out the fibrous strings and used mostly the seasoned liquid left behind (Koranteng, or any other kelewele experts, if you're reading this, maybe you can comment on how much of the spice mixture to use for about 4 plantains? Also, do you ever have problems with clumping of the seasonings?)

              Prepare the plantains. I usually cut off each end, then make a slit along one side to peel the plantain, cut the plantain in half lengthwise, the cut each half as below.

              Sprinkle a few tablespoons of the seasoning mixture over the plantains and stir well to coat. Let them sit for several minutes while you heat up oil in a deep fryer or heavy-bottomed pan to about  350 degrees F. Make sure the oil will not bubble over when you begin adding the plantains. Use a long-handled slotted spoon (my son-in-law has a fancy deep-fryer with a lid; I just use a simple deep-fryer without a basket. A frying pan or other pan would also work). Cook them in several batches, stirring to make sure they do not stick together.

              When they are nicely browned on all sides, remove and drain them on paper towels. Plantains can be eaten with bean stew, but I prefer them with dry roasted peanuts.They're best eaten immediately or soon after cooking.

              And again, Koranteng: Happy Daddy's Day. I'll bet Kumiwah grows up loving kelewele, too.

              P.S. Here's a photo taken a few weeks ago while I was in Berkeley of one of the glorious kelewele batches Koranteng prepared for us:


              Friday, May 27, 2011

              New edition of Tweedie's Ghanaian Cookbook

              Almost exactly 5 years ago I posted about a Ghanaian cookbook by Asantewaa Tweedie called Ghanaian Cooking with a Twist. Since then, Asantewaa and I have corresponded virtually. She returned to Ghana over a year ago, and emailed me recently that she had expanded and updated her cookbook.

              A couple of weeks ago during a visit she made to Pennsylvania we met up together. It was a treat to meet face-to-face for the first time and also to see and hear about the new version,  Melting Pot: Ghanaian Cooking with a Twist. Before returning to Ghana, Asantawaa asked me to continue as the sole North American distributor of her book, which retails at $30.00 plus mailing and handling. If you would like to order a copy, contact market@betumi.com for details.

              Here is an excerpt from our conversation. I apologize in advance for the buzz on the video: I had to use a small digital camera and the quality was not perfect.


              People sometimes ask me if I don't feel like I'm in competition with other Ghanaian cookbook authors. No way. I'm always excited to see the new wave of Ghanaians getting the word out about Ghanaian cuisine. I'd love to see as many Ghanaian cookbooks as there are Italian cookbooks on the shelves!


              Thursday, May 26, 2011

              Ghana regional cookbook update 2

              Hello, faithful followers:


              It's been 3 months since I've posted here. The time was to be spent working hard on the Ghanaian regional cookbook. It worked well--for a week or
              two. . .

              Then the "tyranny of the urgent" took over. I won't bore you with the details, but have decided to start posting again, and continue working on the cookbook at the same time. You all keep me motivated. The picture on the right shows my original thoughts on a cover, but as the book evolves, so has the title. Today I'm thinking of using another Ghanaian proverb ("The good soup comes from the good earth"). As you may recall, my first African cookbook (Pelican, 1993) was called A Good Soup Attracts Chairs.

              The book's format is pretty well designed now. Feel free to look over the summarized table of contents below and let me know if you see something I've left out that ought to be there, or any errors. And if any of you are a potential publisher, or know of any, pass that information along.

              Table of Contents (drafted)
              Preface          Something for Everyone (drafted)
              Introduction:  From Brisbane to Accra--Fran's story (drafted)
                                     From Ghana with Love--Barbara's story(drafted)
              Part I: The West African Kitchen
                                     1. Background, languages, map  (drafted)
                                     2. Ingredients (partially drafted)
                                        Herbs, spices, seeds and oils
                                        Staple foods: roots, grains, plantains and legumes
                                        Meat, poultry, fish, shellfish and snails
                                        Vegetables and fruits
                                    3. Equipment (traditional and modern)
              Part II: Essential flavors and techniques: the building blocks (partially drafted)
                                    Flavor principles: texture, tastes
                                    Seasoning techniques
                                    Basic gravy for stews
                                    Doughs (corn, cassava, fermenting)
                                    Coatings: batter for squid, octopus, yam, groundnuts
                                    Basic stocks
                                    Removing skins from black-eyed peas
                                    Opening coconuts, coconut milk and water
                                    Toasting and grinding corn flour
                                    Tankora powder/rub (yaagi, chichinga powder)
                                    Drying (fruits, vegetables, fish and seafood)
                                    Cooking and food processing techniques
                                    Garnishing
                                    Substitutions
              Part III: Recipes (w/information on regional variations, specialties)
                                   A. Snacks, street foods, and appetizers: includes green plantain chips or strips; cocoyam chips [mankani); fresh corn and coconut; sugar cane; cheese straws; octopus/squid appetizer;meat/fish pies/turnovers, kelewele [seasoned ripe plantains cubes], tubaani [steamed bean balls]; grilled prawns; chichinga [kebabs with a rub called yaagi]; tatale [ripe plantain pancakes]; akla [deep-fried bean balls, aka akara, kose, acara]; kaklo [plantain balls w/corn dough, 2 versions]; fish balls; coated groundnuts; "Kofi brokeman"[roasted ripe plantain];  roasted peanuts; boiled peantus; savory pastry chips; Ghana-style doughnuts [togbei, bofrot]; kuli-kuli [peanut snack]; yam balls [yele kakro]
                                B. Soups
                                    1. Light soups (nkrankra [from meat, fish,vegetables, or all]: with lamb, eggplant, mushrooms and zucchini; fisherman's soup; pepper soup; Fante-Fante; dried vegetable soup; kontomire (greens) soup; egusi (melon seeds) soup; okro soups Ewe style (fetri detsi and fetri ma)
                                   2. Groundnut (peanut), palmnut and sesame soups: chicken groundnut soup; vegetarian groundnut soup; groundnut soup with turkey and okra; groundnut-palmnut soup; classic palmnut soup; palmnut and bean soup; benne (sesame) soup with Guinea fowl or game hens)
                               C. Stews: browned flour and meat stew; groundnut (peanut) stew with chicken and condiments; groundnut stew with meat; sardine stew; corned beef stew; simple bean stew; crock pot bean stew with smoked fish (aka, ase abom or frow, asedua yoo flo, bobo, eduwa forowe, in various languages in Ghana); palaver sauce, garden egg (eggplant) stew with beef, crab and fish; detsi fifi (an Ewe dish between a light soup and gravy); ayikple (coconut and bean stew); okra/eggplant/fish stew; aprapransa or akplijii (seafood and toasted corn stew)
                              D. Protein main dishes: grilled tilapia; grilled prawns; kenam (fried fish); abobo (cooked cowpeas); aboeboe (boiled bambara beans); adayi (pureed cowpeas); domedu (roast pork); Ashanti fowl
                             E. Miscellaneous sauces and seasonings: fresh peppers sauces (green and red); shito; gravy; flavored oils
                             F. Starchy/carbohydrate accompanimentsakpele (corn and cassava dough, simple gari (toasted fermented cassava meal), pino (also from gari), ampesi (boiled starchy vegetables), fried ripe plantain, kenkey, banku (from fermented corn and cassava doughs), oto (a mashed yam and palm oil dish). coated yam; acheke (manioc [cassava] couscous);  TZ (tuo zaafi) from millet, fonio, and/or cassava flour; coconut rice, omo tuo (rice balls); fufu (3 types: cassava, yam, plantain; pounded, microwaved from commercial fufu power, or potato starch and potato buds); yam chips
                            G. One-pot cooking: Gari foto w/corned beef; vegetarian gari foto; jollof rice with chicken; jollof rice with beef; vegetarian jollof rice; jollof rice with shrimp; mpotompoto/nyoma, mpihu (yam pottage/soup); waakye (rice and beans)
                            H.  Beverages and breakfast porridges and meals: rice water, koko (porridge), Hausa koko, Tom Brown (ablemamu), koklui, iced kenkey, gari potowye (soaking);  ginger beer; lemon grass tea; coconut water; sobolo or bissap (hibiscus iced tea); puha (tamarind drink); shandy; fruit juices; beer and wines with Ghanaian food; contemporary: fruit smoothies, Ghana-inspired hot chocolate
                            I. Desserts and baked foods: atwemo (twisted cakes); tiger nut pudding (atadwe milkye, from chufa); sugar bread (loaves and rosca); tea bread; ofam (ripe plantain loaf); caramel custard; fried ice cream; pawpaw fool (papaya); mango fool; groundnut toffee/cake; coconut toffee/cake; fresh papaya with lime fruit salad
              Appendix A: Glossary of Ghanaian terms (drafted)
              Appenndix B: Suppliers, online resources, restaurants, and bibliography
              Appendix C: Akan Day Names

              I must admit, this particular labor of love has turned out to be a huge project. Those of you who pray, please keep me in your prayers, that I'll have the stamina and determination to finish this book. I believe my dream will come true, and will become the comprehensive step-by-step guide to cooking Ghanaian (and much of West African) foods that I kept looking for over the past 30 years!