Showing posts with label african yam. Show all posts

Monday, July 11, 2011

More winning ways with (African) yam: Recipes #79 and 80

I'm jealously guarding the Ghanaian yam from Washington DC. I used part of it to make the oto I wrote about on Saturday. I also made Sam some yam chips, and today I made some "coated yam" (or what Barbara playfully calls "African French Toast").


Here are 2 recipes, both quite simple to prepare.
It seems almost easier to get what are called "potato chips" in Ghana (what we know as "French fries" in the U.S.), imported frozen from abroad, than it is to get freshly made, tasty indigenous yam chips, aka fried yam (yєlє ni ashi). It makes me sad. As an aside, while plantain chips are readily available, both from green and ripe plantains, both salted and spiced, I don't believe I have ever noticed any chips being sold made from other root vegetables such as (likely white) sweet potatoes (atomo), or cassava (duade) though traditionally both are made. (Fried cassava is very common in Brazil.) Occasionally one may see fried cocoyams (koliko) for sale.

Recipe #79: Ghana-style Yam Chips

Please remember that you must use a proper African yam (or similar), not a "sweet potato.")
  • It is quite simple to  make yam chips: peel and cut the yam as you would for French fries (as thick or thin as you like) and leave them in salted water for about half an hour or so.
  • Heat your deep fryer or cooking pot with enough vegetable oil to cover the fries (chips) to about 360-375 degrees F. Do not over-fill the pot so that it will boil over when you add the yam into it.
  • Drain the water off the yam fries before you put them in the water (I usually blot them with paper towels to limit the splattering.
  • Cook them in batches until they are golden, stirring occasionally, and remove with a slotted spoon.
  • Salt them if necessary, and drain on paper or paper towels. 
 If you make this, most Ghanaian males away from home will become your friend for life, especially if you serve them with some shito or fresh pepper sauce (or a tasty stew). No hamburgers, please.

Recipe #80: Coated Yam (or Savory Yam "French toast"-style) with onion omelet


The novelty in this dish is that instead of bread, yam is used, and also, it is, as is often the case in Ghana, savory, not sweet. This is also an excellent use of leftover yam, because then there is no need to precook it.

Assemble the ingredients:

  • yam (enough for each person to have ~4  pieces)
  • 2 eggs per person
  • water for cooking the yam
  • salt
  • 1/2 teaspoon white pepper (I would rather substitute black or red pepper), or to taste
  • 1/2 thinly sliced onion (for 4 people), more or less as desired
  • for garnish: tomatoes, bell peppers, etc., as desired
Directions:

  1. Peel, cut and rinse 4 slices of yam, each about 1/2 inch thick. Cut each round slice in half, and put them into a saucepan with enough water to cover the yam and 1/2 teaspoon salt or to taste.
  2. Bring the water to a boil, covered, and allow the yam to cook for about 10 or 15 minutes. Drain off the water (you can save this to use in soup another day if you like) and set the yam aside.
  3. Break the eggs into a bowl add 1/2 teaspoon of pepper of your choice (white, black, red) and 1/4 teaspoon salt, and mix all well with a fork or wire whisk.
  4. Heat a frying pan (nonstick if available) and add enough oil to cover the bottom of the pan. Dip the yam slices, a few at a time in the beaten egg, turning to coat them. When the oil in the pan is hot, add the yam slices to the pan and allow them to brown on the bottom. Drizzle just a little of the egg mixture on the top of the slices (less that 1/2 teaspoon per piece). They are not supposed to be "wet." When the bottom is nicely browned, turn it over and allow the other side to brown.
  5. Remove the cooked yam to a warm plate (or low oven) and saute the onion in the pan. Add a pinch of salt. Pour the remaining egg on top of the onion slices in the pan and cook until set. Turn and flip the egg mixture in half to make an omelet. East while warm.
To serve: this looks lovely when half the plate or platter holds the yam slices, the other half the omelet, and is garnished with tomato, green pepper, and perhaps a little ketchup or hot sauce drizzled over it. Obviously, this "French toast" is NOT to be eaten with syrup.

It is simple and satisfying.
Wednesday, January 27, 2010

Recipe #37: Mpotompoto: African cocoyam (taro) "goulash"


I started out confident that I could write about both nyoma and  mpotompoto.  Now I realize what I vaguely suspected before: they're the same thing. Several Ghanaians have confirmed this. Barbara Baeta once told me that when it is made with yam, the Ewes call it teba ("yam mud") and that it is also known in Ewe as dablui, which means "cook it and mix it up." Barbara describes it as a kind of Ghanaian goulash.

In Twi, poto means "to mash/grind." I love the reduplication.  However, the root vegetable used is not necessarily mashed, just cooked in broth until the  cocoyam (a kind of taro, aka dasheen, eddo),  or (African) yam or white sweet potato, or even cassava, disintegrates. Mpotompoto or nyoma is also recommended as a weaning food for young children. I find it a light, comforting one-pot meal.

There are, of course, many variations. Here is a simple one using dried ground hot red pepper, cocoyam, palm oil, salt, tomatoes and dried shrimp. Our local chain grocery stores do not carry cocoyams, but I found some beautiful ones at a nearby Asian market.

Ingredients:

about 3 cocoyams (to get a pound when peeled) [or use African yam or white sweet potato]
1 medium onion (about 4 oz)
a couple of tomatoes (about 4 oz) [NOTE: I used cherry tomatoes, since that's what I had handy]
1/4 cup dried pounded shrimps or dried herrings [OR, if you must, substitute a shrimp-flavored seasoning cube]
1/2 teaspoon salt, or to taste


Pound the shrimp, if whole, in a mortar and pestle (I break off the head and end of the tail first, but that's just me)
Wash and peel the cocoyams (I use a potato peeler) and cut into1/2 inch cubes.
Peel the onion, leaving it whole.
Rinse the tomatoes, leaving them whole.

Put the diced cocoyams, whole onion and tomatoes in a small pot with 5 cups of water. Bring it to a boil, then lower the heat  and cook  until the cocoyam is soft (20-30 minutes).

Remove the tomatoes and onions (I use a slotted spoon) and grind them (I use a mini food processor or blender), then return them to the pot.
Add the pounded shrimp, salt, red pepper and about 1/4 red palm oil (or less).
Let the mixture simmer briefly to blend the flavors. Taste and adjust seasoning if necessary.

Enjoy!

Another way to prepare nyoma or mpotompoto is to boil the root vegetable separately, and make a gravy with 1/2 c palm or other vegetable oil, frying the onion a few minutes, then adding sliced tomatoes (and other seasonings as desired, such as ginger, garlic, etc.), then mixing everyting together after the cocoyam, or yam, etc., is tender.

Finally, a third way to do it (and perhaps the most common) is to omit precooking the cocoyam and simply make the gravy, then add additional water and cook the cocoyam in it.

Tuesday, May 19, 2009

Recipe #5: Step-by-step Ashanti fowl, Part 2


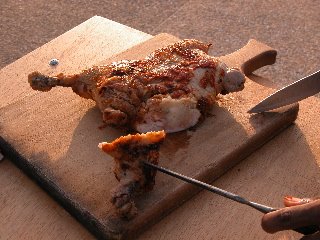
I did an online search to see just what people had to say about "Ashanti fowl," a boneless stuffed roasted chicken. The Congo Cookbook probably had the most comprehensive information, especially about its similarity to Louisiana chef Paul Prudhomme's "turducken." The Congo Cookbook listed (and other people followed its lead in stating there were) only 2 written recipes: Alice Dede's and Barbara Baeta's. Not quite correct: Alice Dede's 1969 version is an adapted version from the earlier Gold Coast Nutrition and Cookery (GCNC) published in 1953. That recipe for "Ashanti Fowl" (p. 146) is identical to Dede's, except that Dede substituted 2 slices of yam for 2 slices of bread. The original recipe using bread seems to indicate some European influence (perhaps a Ghanaian chef experimenting for expatriates?) Please note that Dede is referring to African yam, NOT sweet potatoes or American yams. In Barbara Baeta's 1972 version (see photo on left, from her printed recipe cards), she calls for cooked mashed yams or potatoes. REPEAT: sweet potatoes are nowhere mentioned--this substitution in online recipes is likely due to the confusion over American "yams," which are not at all the same as African yams (I know, I know, I keep saying this over and over). A starchy potato, like a russet, would be a far better choice if African yams are not available. But if you can get them, puna yams from Ghana are best! Or, go back to bread stuffing. By the way, "a slice" of bread or yam is quite imprecise, as you'll see when we get to the stuffing mix part in another blog posting.

Interestingly, in GCNC the recipe immediately preceding the one for the roast fowl includes the "African method" of roasting fowl, which means stuffing it with ground red pepper (as in freshly ground chili peppers), onions, salt and tomatoes. This is consistent with Ghanaian spicy flavor principles. The GCNC book also includes a recipe for making gravy to serve with the roast fowl. This is a Ghanaian-type gravy made from heating a little oil, then browning a tablespoon of flour in it, adding chopped onions, chopped tomato, ground (fresh red) pepper and salt, then adding water, letting it boil for 5 minutes and stirring it well.

I think making gravy to accompany Ashanti fowl is a good idea.

Okay, fast forward to the 21st century. When I was spending time with Barbara Baeta in Ghana at Flair Catering a few years ago, I asked if we could make Ashanti Fowl since I'd always wondered how to do it. She arranged to have one of her young assistants, "Henry (Henrie?)," show me his version, which varied somewhat from Barbara's original recipe.

However, making Ashanti chicken is not for the faint-hearted nor the person in a rush. It's pretty complex, so I'll break it down into parts.

Today I'll talk about the first part, which for me was the biggest challenge, de-boning the chicken. Most recipes simply say "de-bone" or vaguely "remove the bones from the chicken" (I'm sure you could use another "fowl, " like guinea fowl, but in this case they always seem to mean chicken). I'm not trained as a professional chef, and maybe you learn de-boning chickens in chef's school, but for the rest of us, here's how I did it. Sharpen your knives before you begin!

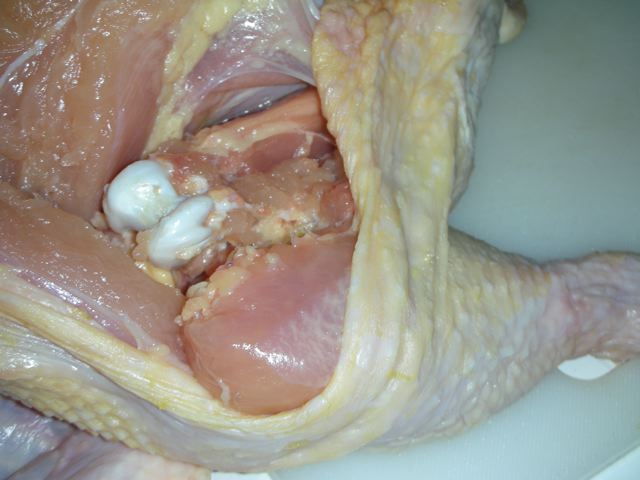
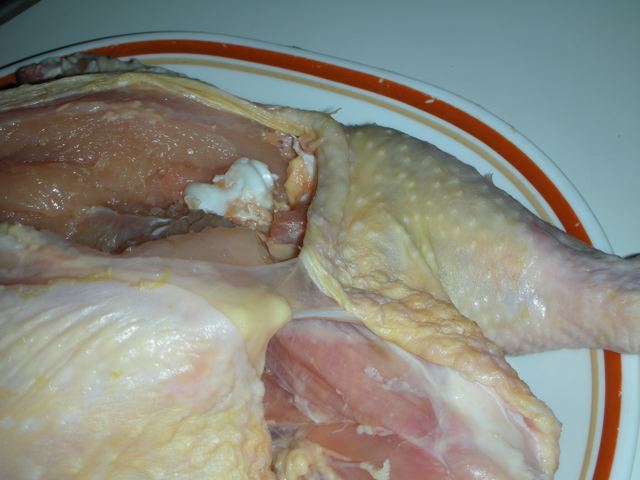
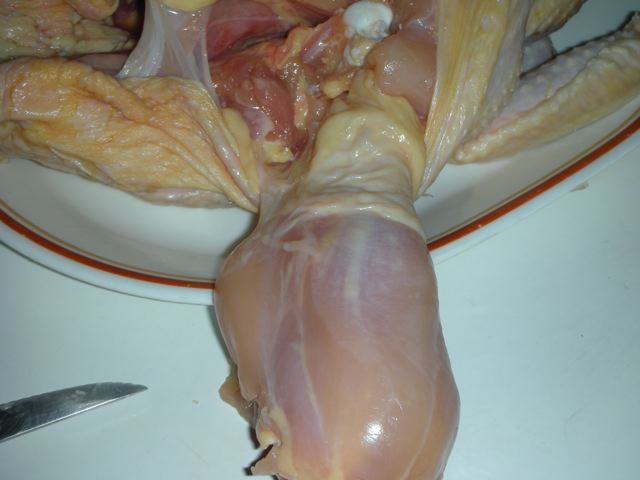
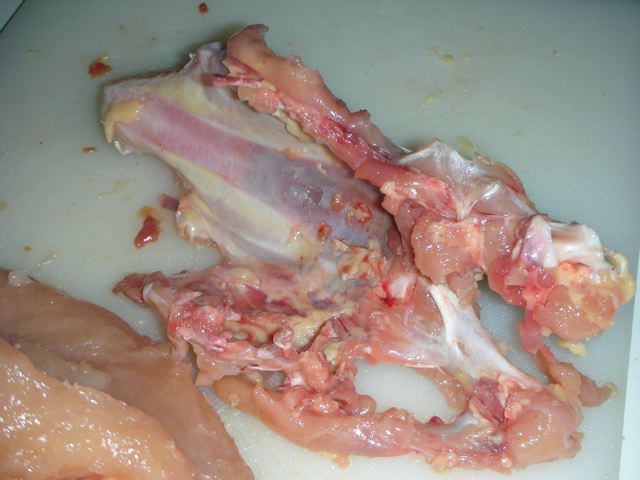
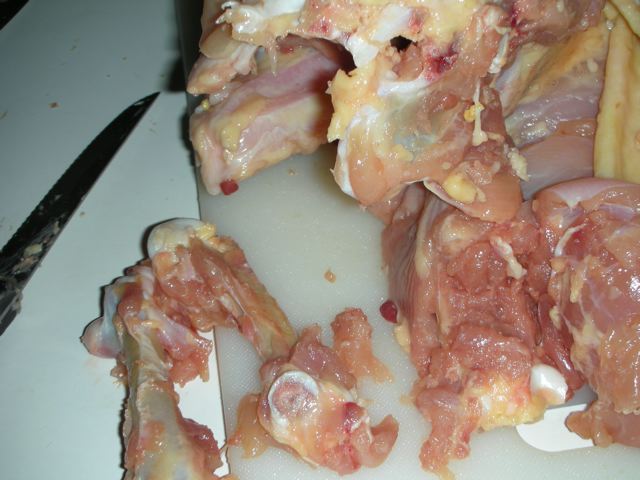
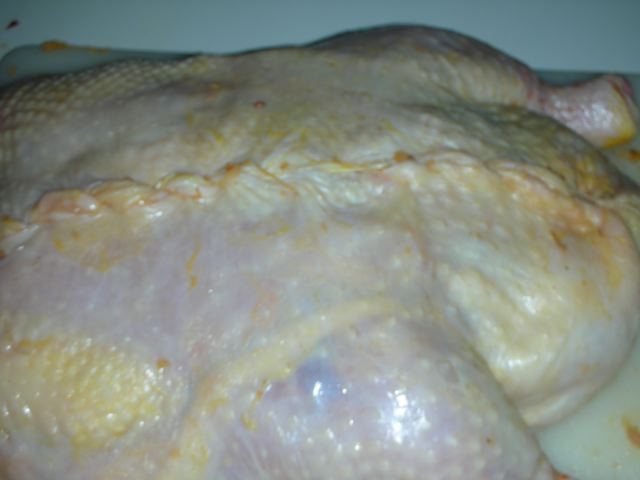
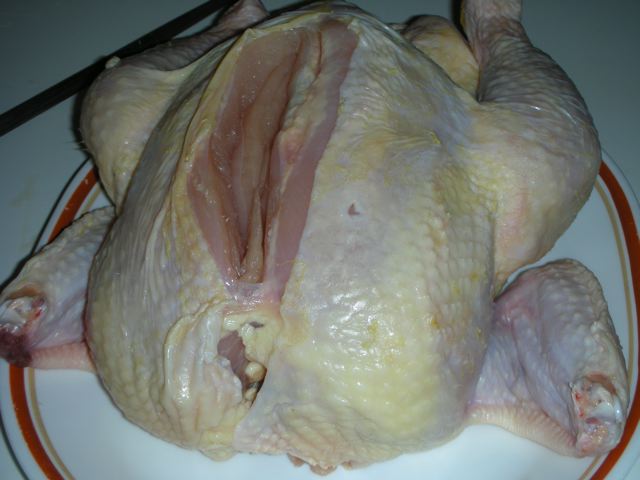
Fortunately, I didn't have to kill and pluck the chicken and remove its insides. Here are the photos I took, messily, as I worked in the kitchen:

1. Wash and pat the chicken dry with paper towels. I used a roaster chicken, heavier than the 3 or so pound chicken usually recommended. A roasting chicken is "harder" than a fryer and thus easier to debone.

2. I should have started by cutting of the wings at the joint (that caused a problem at the end), but instead I began at the top (back) by the neck end and carefully cut alongside the breastbone, cutting down to around where the thigh is and turning it around and cutting back the other way. Notice, I didn't cut all the way to the end.
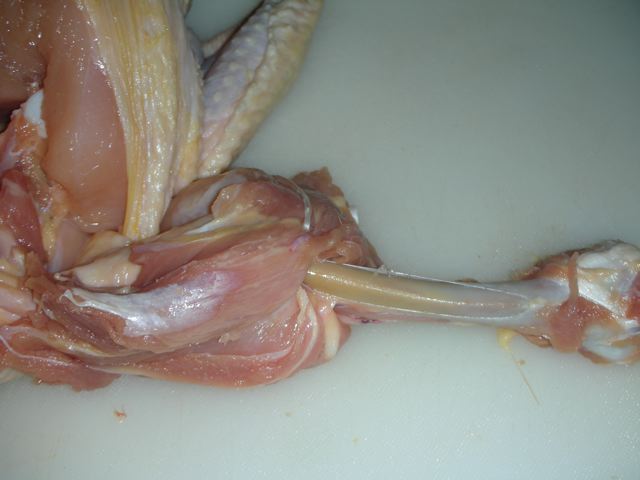
3. My notes said "cut the drumstick free and loosen both sides." I gather that meant cut it free at the joint, loosen the skin from the chicken, then flip the drumstick (without its skin) outside so that, holding the fat end of the drumstick, you can scrape to the bone to
release the meat.


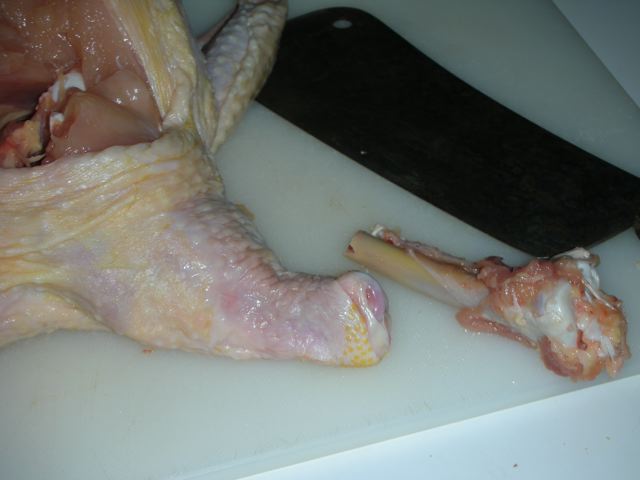
4. Using a cleaver (or other heavy knife), break the bone so that about a half inch of the end of the drumstick is left. This is the only bone that will be left in the whole chicken at the end.

5. Push the drumstick end back into the chicken and repeat with the other drumstick.

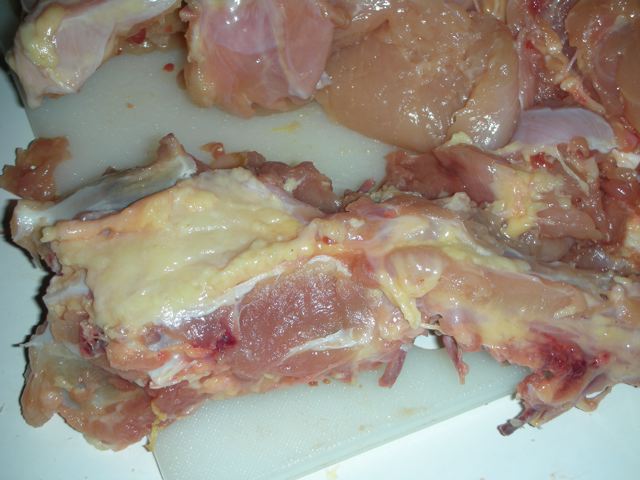
6. Loosen the skin all down the back, starting from the neck end to the tail. I had trouble with this near the end because the skin wouldn't easily loosen from the bone and wanted to break.
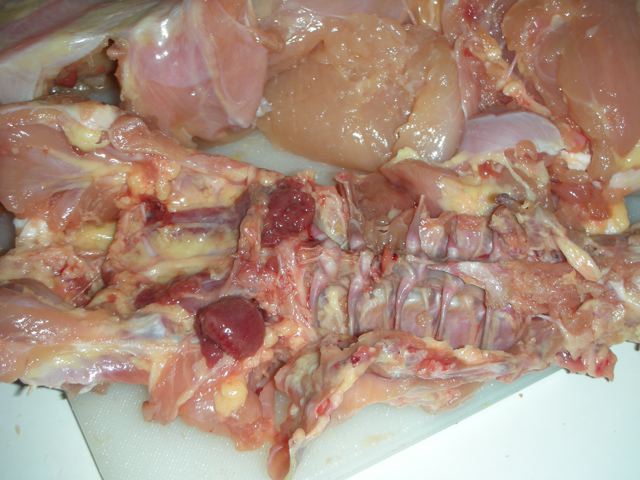
7. The next part was cutting the backbone off and separating it from the breastbone. That was kind of messy. I was breaking bones and trying to figure out how to separate the two. It finally came out. It looks like I forgot to take pictures near the end (it was getting late, everyone was hungry, and I was trying to hurry).
The net result was, I eventually separated the breastbone and backbone, scraping as much meat as possible off the bones before I removed them.


8. After I did all that, I should have had all the bones out (except for the token end of the drumstick, which is part of the final presentation). However, since I had not taken care of the wings earlier (at the beginning, right after blotting the chicken), I had to cut them each off at the joint, and remove them.

9. By this point the chicken was deboned, and I just realized I didn't take any pictures of it flattened out before I stuffed it. The next one I took was when I had already stuffed it. Whoops. At least you get the idea. Check back soon to see what I included in my stuffing, and the rest of the adventure. My apologies to all of you who can neatly and efficiently do this deboning bit. Are there better online resources showing how?