Showing posts with label Flair. Show all posts

Thursday, October 22, 2015

Cookbook Update: From then to now

Fran & Kwadwo 1972

Cookbook update: Yay! Friends, it's finally happening. We're just days away from The Ghana Cookbook's  release. Thank you to everyone who has pre-ordered. (Note: Hippocrene increased the size of the  print run given the enthusiasm and advance orders.) Here's a link to more information from the publisher (it should be in stores by Nov. 9, 2015).

All remains a labor of love on my part, and many, many hours of work, which is why I've basically ceased blogging these past months.
   
Projects currently underway:
  • Updating BETUMI's website (a long-overdue project)
  • A trailer for The Ghana Cookbook (stay tuned)
  • Events, articles, and signings to be arranged. Already planned:
    • November 13, 2015: cooking demonstration and luncheon at New Leaf Initiative in State College using recipes from the book. 
          • January 28, 2016:  Accra, Ghana. Book launching at Flair Catering (with Barbara!) Hopefully, events will also take place in the San Francisco Bay Area, Boston, New York, Philadelphia, and Portland, Oregon.
 A team at Penn State's Happy Valley Communications (HVC) is helping to get the word out, and has set up a twitter account to help with the countdown and offer tantalizing tidbits to whet your appetite for the book.  HVC is also working with me on an instagram site called The Ghana Cookbook. I'll update folks here as things roll out.

Many of you know one of my favorite sayings from Ghana that has long been my mantra:
"Little, by little, the chicken drinks water." 
The family keeps growing

Thursday, July 07, 2011

Recipe #76: Cassava (yucca) Dough

The Ewe people number between 3 and 6 million people (I've seen figures citing both),  mostly living in Southeastern Ghana in the Volta Region and also southern parts of neighboring Togo and Benin. While my collaborator Barbara Baeta can and does prepare dishes from all 10 regions in the country, she is an Ewe woman, and her heart belongs to places like Keta along the coast. On her own table, she displays a love of dishes featuring the  riches of the sea and coast, fresh and dried seafood, garlic, okra, and dishes including cassava dough, such as akple, the Ewe answer to banku. The main difference between the two is fermentation and the  cassava dough (banku is all or mostly made from fermented corn dough; akple is made from unfermented corn dough and cassava dough).

One of the challenges in writing our Ghanaian cookbook for folks outside of Ghana  is the difficulty in duplicating some of the ingredients easily found in any open-air market there,  such as corn dough and cassava dough, or even fresh cassava. However, the name of this blog and network, "BETUMI," comes from the Akan word "tumi," meaning "to be able to."

So, in the spirit of "can do," here is my approach to creating the doughs. I've already explained how to make fermented corn dough using white Indian Head corn meal (see the link to banku above), and 2 days ago I decided to try using dried hominy corn to make a smoother corn dough. That's the whiter one in the photo to the right and the  one I may use when I make the akple after my cassava dough is ready in a couple of days (Incidentally, the Goya corn I ground doesn't seem to be fermenting anyway. I wonder if it was treated with lime or something?) Or, you can make the dough as for banku (the one on the right in the photo), but without letting it ferment.

To make akple you need to combine twice as much corn dough as cassava dough. Today's recipe, following the sketchy directions in my notes, is for cassava dough:

"Peel cassava, wash it, grate it very fine, mix water if not too wet, put in a sack and put a stone or heavy pot on it and let drain for 2-3 days."

Recipe #76: Cassava (yucca) dough
  • Finding fresh cassava is the first challenge. It is a root and will probably be called yucca in the market. It will be likely coated in wax. Unapologetically ask someone in the produce department to cut a few tubers in half before you buy them to make sure they are not rotten (I usually find they are when I shop).  When you get them home (I bought 3 and still had to discard part of one), peel them and drop them in some water. I usually cut the ends off, cut them in half at the center, then use a sharp knife to kind of peel back the dark bark. I ended up with about a pound of peeled cassava.
  • The next step is not for the fainthearted. Roll up your sleeves and use some elbow grease to grate the cassava into a clean bowl. I used the "fine" side of a box grater. It's possible that a food processor could also do this, but I'm sticking exactly to my notes this time. If you also cut the pieces horizontally, you'll see a kind of stringy piece that runs down the cassava. I pulled a few of those out, but also grated some of them along with the rest of the cassava.
  • "Mix water if it is not too wet" was cryptic, so I decided to add some water, reasoning that if it was too much it would just drain out eventually. To my 2 1/2 cups of grated cassava, I added about a half cup of water in the bowl and swished it around in the stainless steel bowl I was using.
  • How to drain it? I decided to put the grated cassava into a clean pillowcase, set a stainless steel bowl weighted down with rocks on top of it, placed the pillowcase on a patio chair with a plastic pan under it to catch the starchy water draining out. Not too elegant, but it seems to work. I also doubled the pillow case, and put a paper towel between the chair. If rain threatens, I'll move the chair into the garage, but I've got it outside during the day.
  • On Saturday I'll take it out and see what we have. . .

Friday, November 13, 2009

Recipe #28B: African doughnut, Cake Version


Today's posting continues yesterday's  about the Ghanaian doughnut called bofrot or togbei. Here is the cake version, made with baking powder but not wine and/or yeast.

This recipe is adapted from one used by Barbara Baeta of Flair Catering in Accra. These are faster to make, with a different texture from a yeast version--more coarse and crisp, just as a muffin differs from a regular slice of bread. Either way is tasty.

In the photo below, the wine and yeast on the right are the ingredients special to the yeast version, those on the left (the vanilla and margarine) are special to the baking powder version, and all the others are common to both (the sugar, egg, salt, bread flour, nutmeg and baking powder). This is a small batch (1/8 of the original recipe, thus some of the awkward measurements). Also, remember that by a cup I mean 8 fluid ounces, not 10.

Baking powder version:

6 ounces of bread flour (about an 8 ounce cup of unsifted)
3/8 teaspoon salt (a rounded 1/4 teaspoon)
1.5 oz margarine (3 Tablespoons)
1.5 oz sugar (3 Tablespoons)
1/2 teaspoon ground nutmeg
1/2 teaspoon vanilla
1 egg
1/4 cup evaporated milk plus 1/2 cup water (or use 3/4 cup regular milk)
5/8 teaspoon (a rounded 1/2 teaspoon) baking powder
vegetable oil for deepfrying 


Sift the flour and salt into a bowl, and cut in the margarine (I use my hands or 2 table knives) until the mixture resembles cornmeal. Stir in the sugar, nutmeg, and baking powder.

In a separate bowl, beat the egg, then add the milk (and water, if using), and vanilla and mix well. Make a hole in the center of the flour mixture and add the liquids all at once, blending with a few swift strokes to keep the batter from becoming tough. Let the batter sit for about 30 minutes.

While waiting, line a colander with paper towels to drain the bofrot after cooking them.
About 10 minutes before the 30 minutes are over heat vegetable oil (I like canola) in a deep fryer or a deep, heavy pan to 375 degrees farenheit. Do not fill the pan with oil more than halfway because the oil will bubble up when the dough is added. When the oil is hot enough, a small amount of dough dropped into the oil will quickly rise to the surface. If the oil is too hot, the dough will brown too quickly and the center will not have time to cook.


You can make the balls any size you like, but they are usually larger than a golf ball, a little smaller than a tennis ball. When the oil is ready, I usually slip a large spoon, like a soup spoon, into the oil to coat it, then dip it in the batter and slip a spoonful into the hot oil, using a finger or another soup spoon to quickly drop the dough in the shape of a ball into the oil. If the dough flattens out rather remaining in the shape of a ball, there is likely too much liquid in the batter.


Cook the doughnuts in batches until they are quite browned on all sides. They will likely turn over as the cook, but use a long-handled slotted spoon to stir and turn them as necessary. Use the slotted spoon to lift them out into the colander to drain and cool. They can be eaten when warm or at room temperature.


Thursday, September 03, 2009

Breakfast menu for the Obama visit to Ghana 11 July 2009

Below is the menu provided to me by Barbara Baeta Bentsi-Enchill, the Executive Chairman and founder of Flair Catering Services in Ghana, of the breakfast buffet served to President and Mrs. Obama and their entourage at the Presidential Castle on 11 July 2009.

I've unsuccessfully scoured the Internet trying to locate ANY photos of the food or buffet lines. This omission seems to indicate a glaring lack of curiosity about or interest in Ghanaian cuisine displayed by the myriad photographers--all of the breakfast pictures show only the important dignitaries present, and I've not been able to find one that shows the food.

What an opportunity missed.


Menu

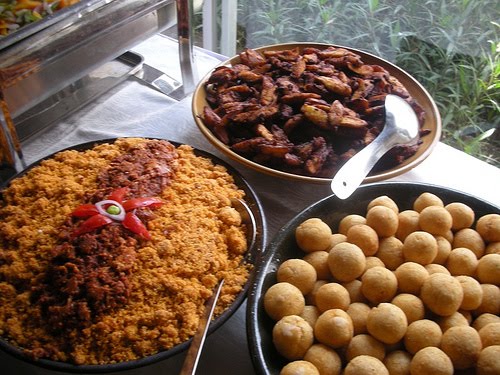
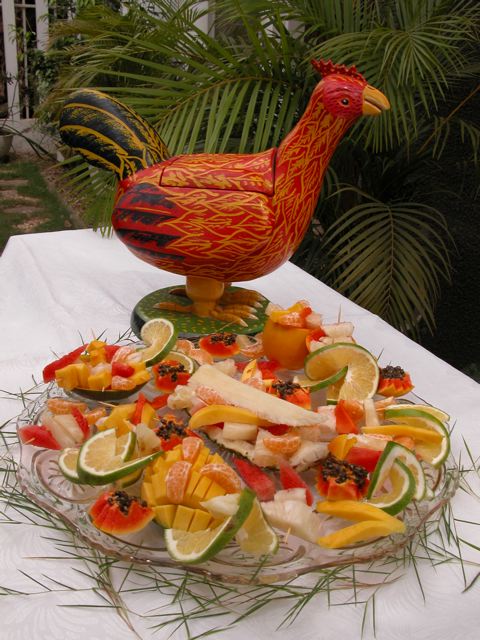
Tropical Fruit Juices (NOTE: I assume this would have included orange, pineapple, mango, papaya or similar juices). All of the items in bold will be found in our upcoming cookbook, and some are things I've already blogged about. I've included a couple of representative photos I've taken at Flair, but these ARE NOT from the July breakfast.

Variety of Tropical Fruits (Again, probably Ghana's fantastically sweet pineapples, along with papayas, mangos, soursop, melons, oranges, etc.).

Tom Brown (porridge made from toasted corn flour)
Hausa Koko (a spiced millet porridge)
Akra (a black-eyed pea fritter, aka kose, akara)
Beans Stew (a stew often made with smoked fish and red beans or black-eyed peas and eaten with ripe plantain)
Fried Plantain (probably ripe or "red" plantain slices)
Waakye with Meat Stew (rice and black-eyed peas with a meat stew made with tomatoes, onions, probably beef, etc.)
Galifoto (also known as "gari foto," a one-pot made from cassava meal similar to Brazil's farofa)
Oto with Boiled Eggs (a traditional dish made from mashed yam, onion and palm oil garnished with hard-boiled eggs)
Individual Steaks of Fried Fish (while Ghanaians often eat tilapia, Barbara said they used grouper steaks for this meal)
Abolo (a baked corn dough and flour or sweet potato dough; another version omo abolo is made from rice) & Kenkey (steamed soured corn dough balls)
Shito (pepper sauce)
Scrambled Eggs with Bacon
Grilled Tomatoes & Sausages
Brown & White Rolls
Butter
Assorted Jams & Marmalade
Tea
Coffee
Hot Chocolate

Wednesday, September 02, 2009

Flair Cooks for Obamas in Ghana

I telephoned my colleague Barbara Baeta of Flair Catering in Ghana (and my collaborator on our upcoming Ghanaian cookbook, the recipes of which are appearing in development on Betumiblog regularly) to find out if she could help me discover what the Obama family was served during their stay in Accra in July. It turns out the one State meal catered for them was breakfast, and her own Flair Catering was selected to provide that meal (for 600 people)! She's sending me the menu tomorrow (Thursday), so check back to find out what was served. Barbara was quick to point out that she knows what Flair served, but not what the Obamas themselves actually ate.

She compared the security there in 2009 to that when she cooked for President Jimmy Carter (pre 9/11)--then it was much looser, and she was able to chat with the President; this time, though she was a few yards away from President Obama, and saw his wife come down, she was unable to meet them and security soon hustled everyone away. Plus, there were meetings going on upstairs, where Flair also set up a buffet table, but she doesn't know if President Obama actually tried any of the food or not. A combination of Ghanaian and European food was served.

Barbara commented to me that some of the culinary
reporting was inaccurate. Among other things, they got her name wrong and called her "Henrietta." Also, while kenkey was part of the buffet, tilapia was not ("I wasn't going to take a chance on all those bones."). Instead, she said, they prepared grouper fillets. I hope she'll be able to get some pictures of the tables, too. She said everything looked lovely, but security was so tight there was no way for her to photograph anything herself. For some photographs I took at Flair's 40th birthday party in 2008, go to BETUMI's flickr account.

Tuesday, May 19, 2009

Recipe #5: Step-by-step Ashanti fowl, Part 2


I did an online search to see just what people had to say about "Ashanti fowl," a boneless stuffed roasted chicken. The Congo Cookbook probably had the most comprehensive information, especially about its similarity to Louisiana chef Paul Prudhomme's "turducken." The Congo Cookbook listed (and other people followed its lead in stating there were) only 2 written recipes: Alice Dede's and Barbara Baeta's. Not quite correct: Alice Dede's 1969 version is an adapted version from the earlier Gold Coast Nutrition and Cookery (GCNC) published in 1953. That recipe for "Ashanti Fowl" (p. 146) is identical to Dede's, except that Dede substituted 2 slices of yam for 2 slices of bread. The original recipe using bread seems to indicate some European influence (perhaps a Ghanaian chef experimenting for expatriates?) Please note that Dede is referring to African yam, NOT sweet potatoes or American yams. In Barbara Baeta's 1972 version (see photo on left, from her printed recipe cards), she calls for cooked mashed yams or potatoes. REPEAT: sweet potatoes are nowhere mentioned--this substitution in online recipes is likely due to the confusion over American "yams," which are not at all the same as African yams (I know, I know, I keep saying this over and over). A starchy potato, like a russet, would be a far better choice if African yams are not available. But if you can get them, puna yams from Ghana are best! Or, go back to bread stuffing. By the way, "a slice" of bread or yam is quite imprecise, as you'll see when we get to the stuffing mix part in another blog posting.

Interestingly, in GCNC the recipe immediately preceding the one for the roast fowl includes the "African method" of roasting fowl, which means stuffing it with ground red pepper (as in freshly ground chili peppers), onions, salt and tomatoes. This is consistent with Ghanaian spicy flavor principles. The GCNC book also includes a recipe for making gravy to serve with the roast fowl. This is a Ghanaian-type gravy made from heating a little oil, then browning a tablespoon of flour in it, adding chopped onions, chopped tomato, ground (fresh red) pepper and salt, then adding water, letting it boil for 5 minutes and stirring it well.

I think making gravy to accompany Ashanti fowl is a good idea.

Okay, fast forward to the 21st century. When I was spending time with Barbara Baeta in Ghana at Flair Catering a few years ago, I asked if we could make Ashanti Fowl since I'd always wondered how to do it. She arranged to have one of her young assistants, "Henry (Henrie?)," show me his version, which varied somewhat from Barbara's original recipe.

However, making Ashanti chicken is not for the faint-hearted nor the person in a rush. It's pretty complex, so I'll break it down into parts.

Today I'll talk about the first part, which for me was the biggest challenge, de-boning the chicken. Most recipes simply say "de-bone" or vaguely "remove the bones from the chicken" (I'm sure you could use another "fowl, " like guinea fowl, but in this case they always seem to mean chicken). I'm not trained as a professional chef, and maybe you learn de-boning chickens in chef's school, but for the rest of us, here's how I did it. Sharpen your knives before you begin!

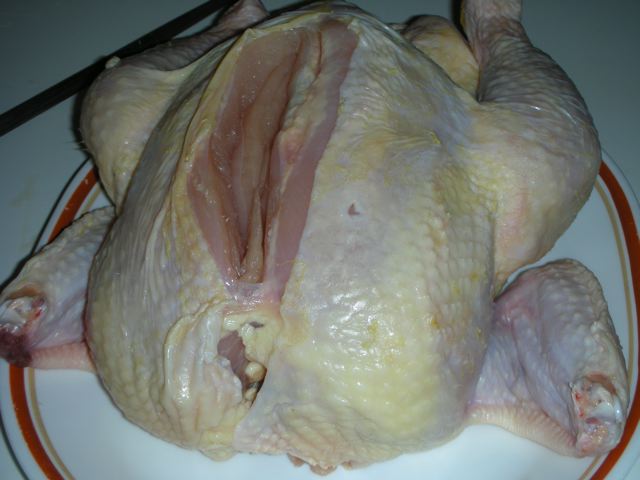
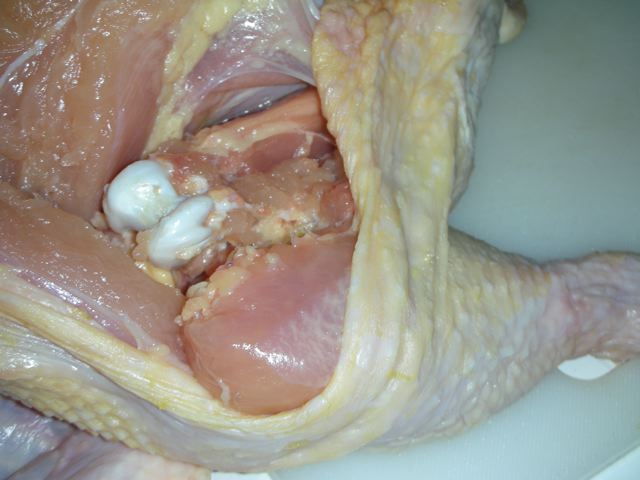
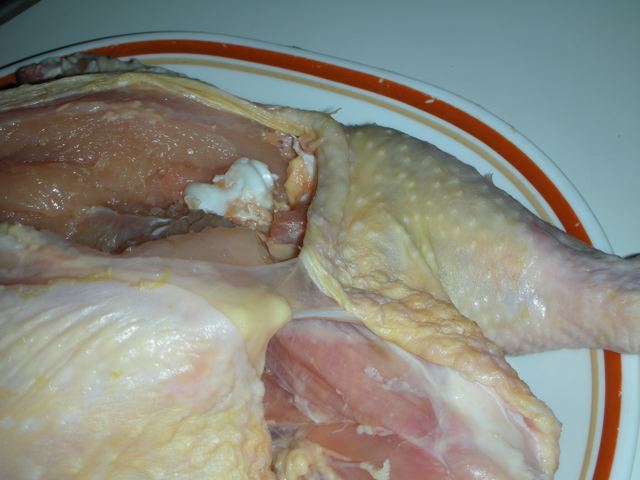
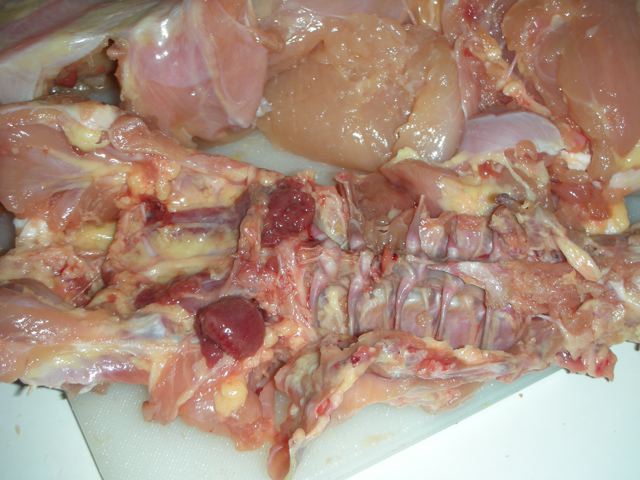
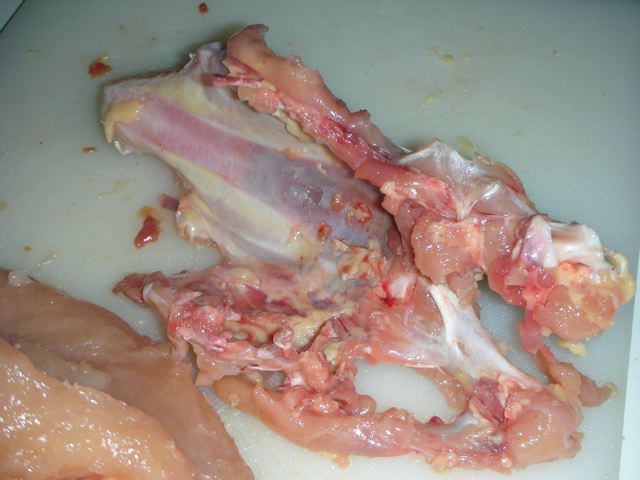
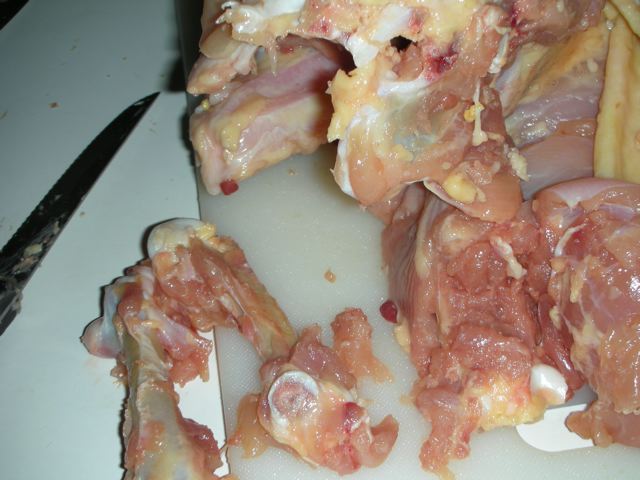
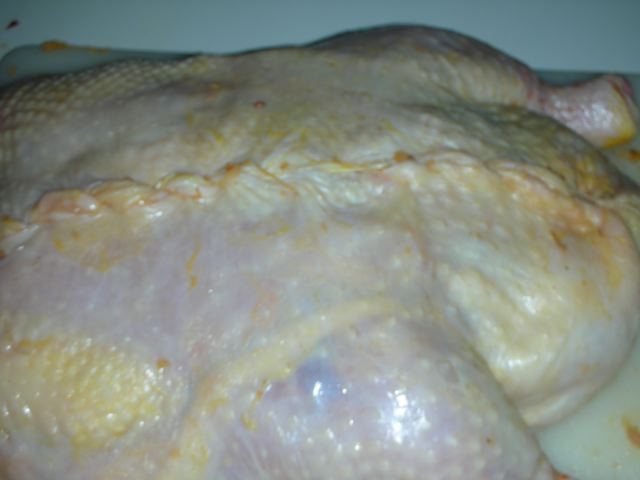
Fortunately, I didn't have to kill and pluck the chicken and remove its insides. Here are the photos I took, messily, as I worked in the kitchen:

1. Wash and pat the chicken dry with paper towels. I used a roaster chicken, heavier than the 3 or so pound chicken usually recommended. A roasting chicken is "harder" than a fryer and thus easier to debone.

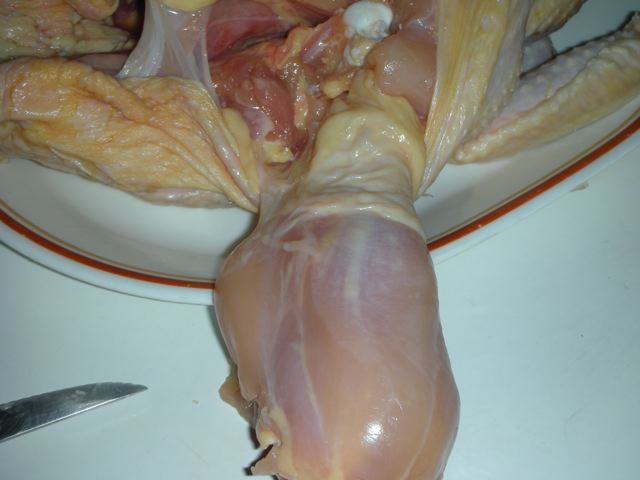
2. I should have started by cutting of the wings at the joint (that caused a problem at the end), but instead I began at the top (back) by the neck end and carefully cut alongside the breastbone, cutting down to around where the thigh is and turning it around and cutting back the other way. Notice, I didn't cut all the way to the end.
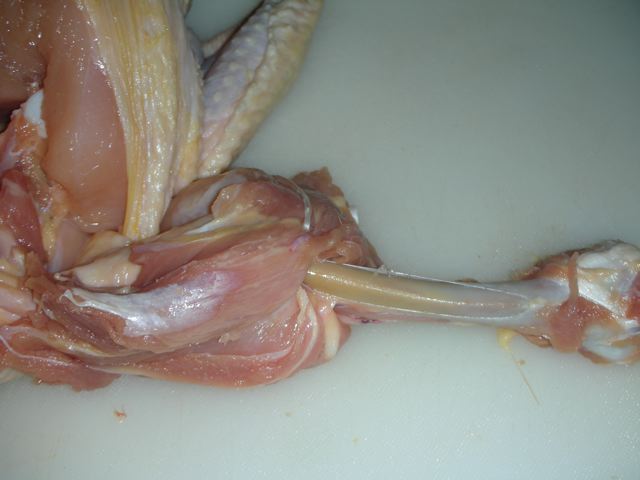
3. My notes said "cut the drumstick free and loosen both sides." I gather that meant cut it free at the joint, loosen the skin from the chicken, then flip the drumstick (without its skin) outside so that, holding the fat end of the drumstick, you can scrape to the bone to
release the meat.


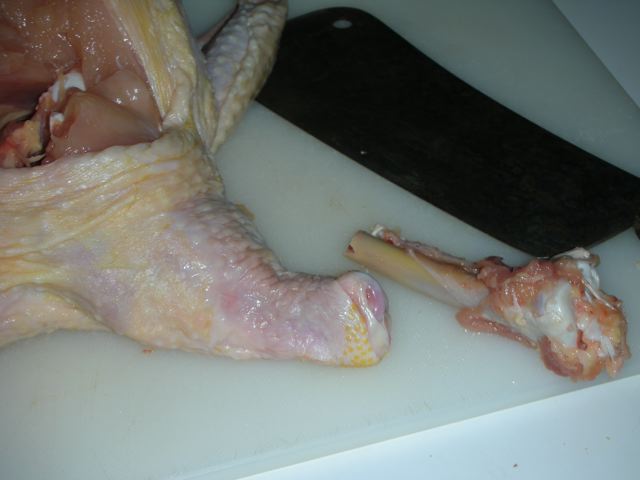
4. Using a cleaver (or other heavy knife), break the bone so that about a half inch of the end of the drumstick is left. This is the only bone that will be left in the whole chicken at the end.

5. Push the drumstick end back into the chicken and repeat with the other drumstick.

6. Loosen the skin all down the back, starting from the neck end to the tail. I had trouble with this near the end because the skin wouldn't easily loosen from the bone and wanted to break.
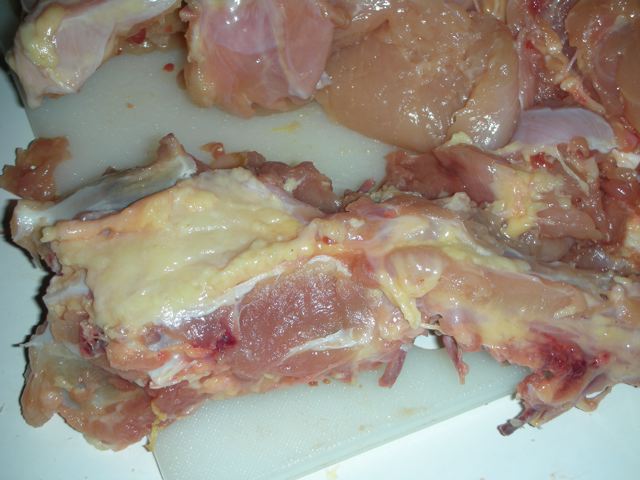
7. The next part was cutting the backbone off and separating it from the breastbone. That was kind of messy. I was breaking bones and trying to figure out how to separate the two. It finally came out. It looks like I forgot to take pictures near the end (it was getting late, everyone was hungry, and I was trying to hurry).
The net result was, I eventually separated the breastbone and backbone, scraping as much meat as possible off the bones before I removed them.


8. After I did all that, I should have had all the bones out (except for the token end of the drumstick, which is part of the final presentation). However, since I had not taken care of the wings earlier (at the beginning, right after blotting the chicken), I had to cut them each off at the joint, and remove them.

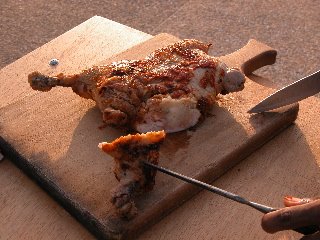
9. By this point the chicken was deboned, and I just realized I didn't take any pictures of it flattened out before I stuffed it. The next one I took was when I had already stuffed it. Whoops. At least you get the idea. Check back soon to see what I included in my stuffing, and the rest of the adventure. My apologies to all of you who can neatly and efficiently do this deboning bit. Are there better online resources showing how?

Wednesday, July 11, 2007

Africa Cookbook Project Update and Auntie Sika


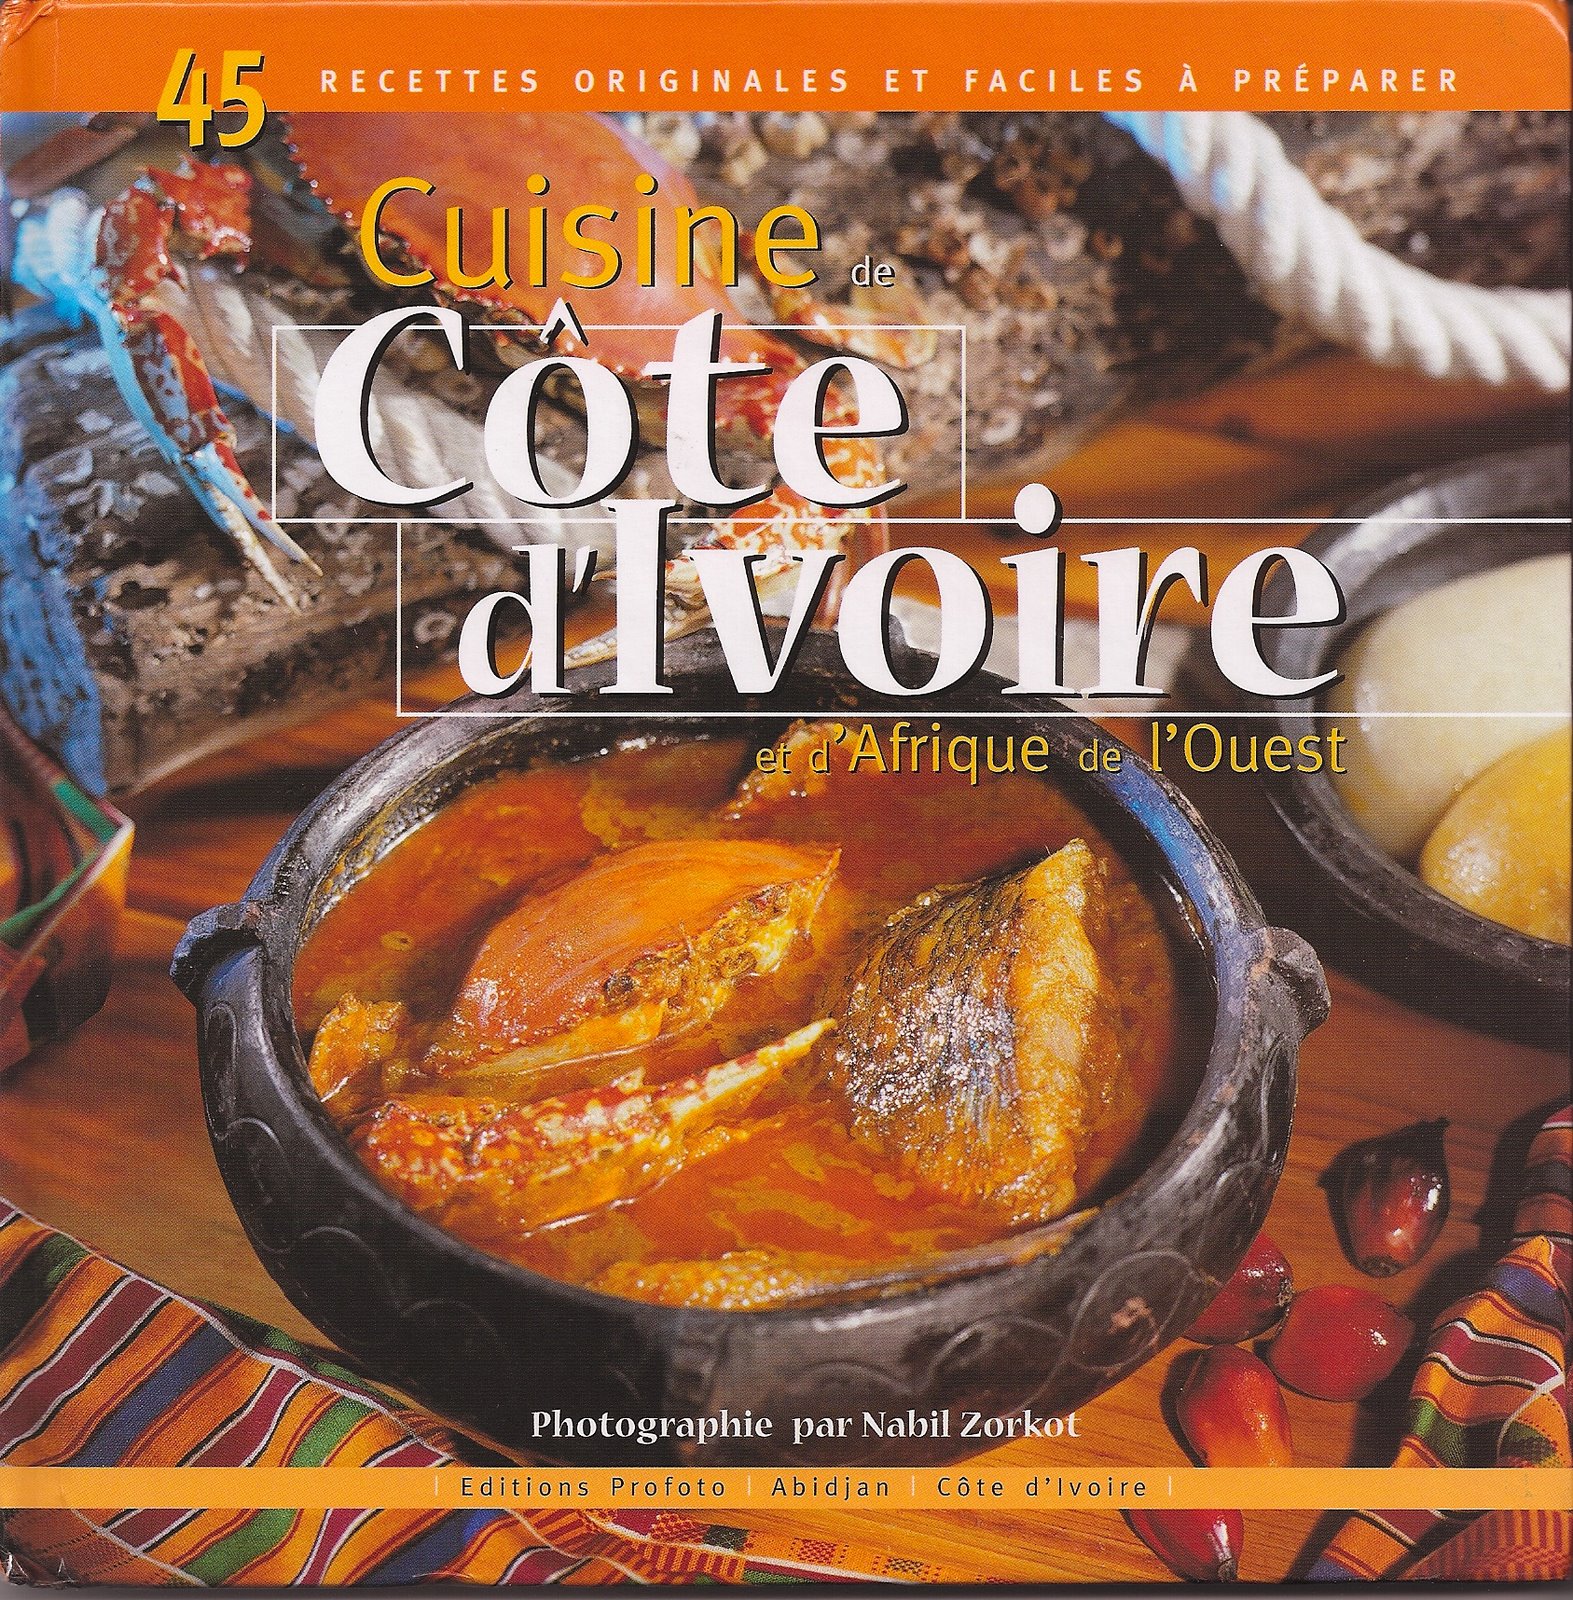
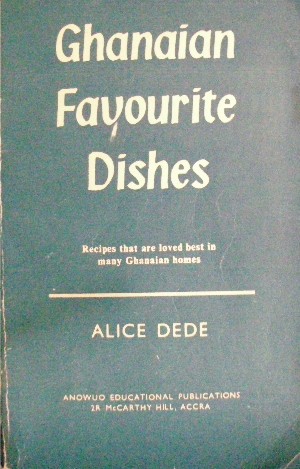
On the left is the latest cookbook to come to the collection (thank you TEDGLOBAL fellow Issa Diabate), and below is the first African cookbook I ever received, in 1971, from my sister-in-law-to-be. I know I'm repeating myself, but thank you to everyone who is helping spread the word. Also, thank you to Tom and Barbara Hale of Penn State University, who have promised to donate from their collection when I return to Pennsylvania. By the way, there's no reason that the culinary heritage should exclude other types of culinary work, from videos to articles.

Secondly, included here is the brief interview with Barbara Baeta that I promised to post. It is preceded by a few minutes of introduction.